Table of Contents
Introduction
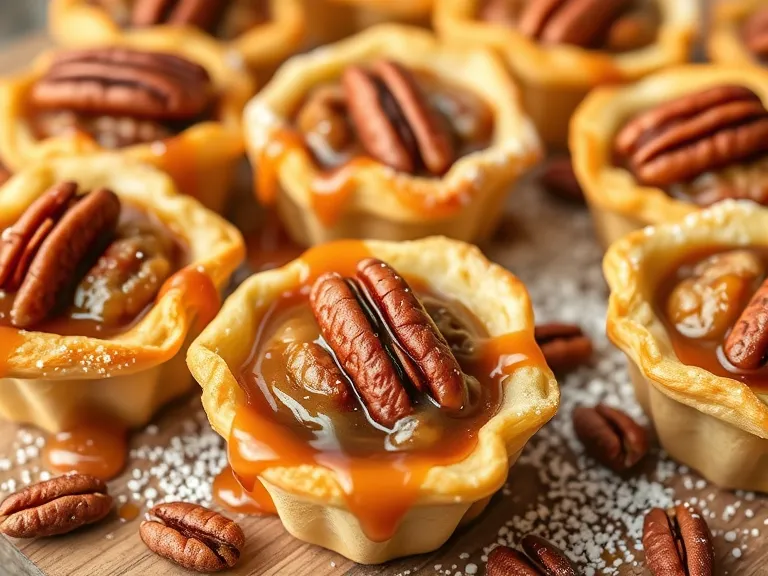
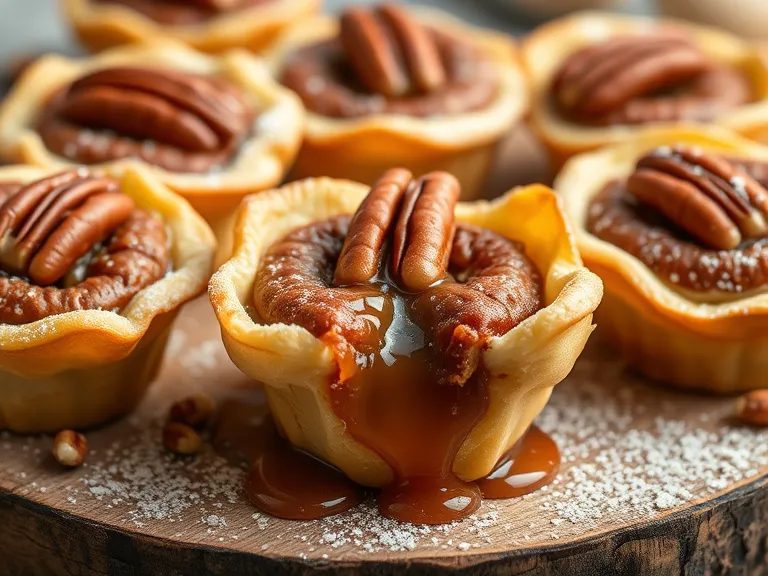
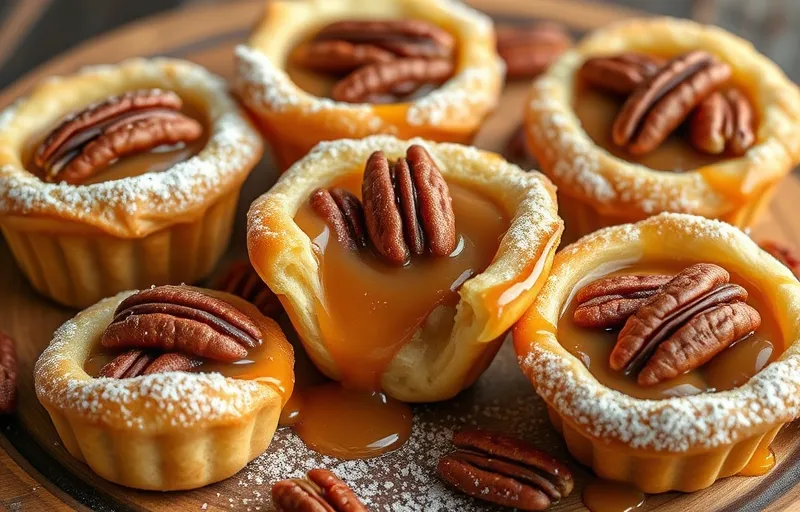
Pecan Tassie Nut Cups are a delightful, bite-sized dessert that combines the rich, nutty flavor of pecans with a sweet, buttery filling—all encased in a flaky, golden crust. These mini treats are a twist on the traditional pecan pie, offering all the deliciousness in a much more convenient, portable form. Whether you’re hosting a holiday gathering, a party, or simply craving a sweet snack, these nut cups are sure to be a hit.
What makes this recipe so appealing is its simplicity. In just three easy steps, you can create these perfect mini tarts. The crust is made from basic pantry staples like butter, flour, and sugar, while the filling is a combination of sweet brown sugar, rich pecans, and eggs, baked to golden perfection. The best part? They’re incredibly easy to make—perfect for beginners and seasoned bakers alike! Pecan Tassie Nut Cups
Pecan Tassie Nut Cups are ideal for any occasion. Their mini size makes them a great choice for parties, holidays like Thanksgiving and Christmas, or even just as a sweet snack for your family. They’re great for sharing and easy to serve, making them a crowd-pleaser at gatherings. Whether you’re looking for a fun holiday dessert or a simple treat for a special occasion, these nut cups will surely impress and satisfy everyone’s sweet tooth.

What Are Pecan Tassiet Cups?
Pecan Tassie Nut Cups are mini versions of the classic pecan pie, but with a fun twist! These bite-sized treats consist of a buttery, flaky crust that is filled with a sweet, gooey mixture of pecans, brown sugar, eggs, and a touch of vanilla. The result is a delightful combination of crunchy, nutty goodness paired with a rich, caramelized filling that’s simply irresistible.
Definition and History of Pecan Tassies
The word “tassie” comes from the Scottish term for a small cup or a little bowl, which is fitting because these mini desserts are served in small, muffin-like cups. While the exact origin of pecan tassies is unclear, they are believed to have been inspired by the traditional Southern pecan pie, which has been a popular dessert in the United States for generations. Southern cooks began creating mini versions of the pecan pie during the mid-20th century, especially for holiday gatherings, where bite-sized treats were more convenient for serving a crowd.
Though they share many similarities with pecan pie, pecan tassies have their own unique twist. Instead of a large pie crust, they’re baked in small individual portions that make them easier to serve, share, and enjoy without the need for slicing. Over time, these mini tarts have gained popularity as a party dessert and a festive treat, making appearances at everything from Thanksgiving and Christmas dinners to casual family gatherings.
Difference Between Mini Pecan Tarts and Traditional Pecan Pies
While both pecan pies and pecan tassies feature the same delicious filling of pecans and sweet syrup, the main difference lies in the size and presentation. Traditional pecan pie is baked as a single large pie, typically served in slices, while pecan tassies are small, individual servings. This makes pecan tassie nut cups much more convenient for events like parties, where guests can easily grab a tart without needing to cut a slice. Additionally, pecan tassies often have a slightly thicker crust-to-filling ratio, offering a delightful balance of flaky crust and gooey filling in each bite.
Pecan tassies are also easier to make for beginners, as you don’t have to worry about perfecting the art of cutting and serving a large pie. They bake faster and allow you to control portion sizes, making them ideal for smaller gatherings or situations where you want to offer a variety of desserts.
Why They’re a Perfect Bite-Sized Treat for Any Celebration
Pecan Tassie Nut Cups are the ultimate party dessert for several reasons. Their small size makes them easy to serve and perfect for guests to pick up with their hands. They’re also incredibly versatile, making them suitable for a wide range of celebrations, from holiday gatherings to birthdays and potlucks. Their rich, nutty flavor pairs well with both savory and sweet dishes, making them a great addition to any dessert table.
Because they’re so simple to prepare and bake, pecan tassies are a stress-free option when you need to make a crowd-pleasing treat. You can easily make them in advance, which means less time spent in the kitchen and more time enjoying your event. Plus, their cute, mini size makes them an appealing treat for both kids and adults alike. Whether it’s for a cozy family gathering or a large party, pecan tassie nut cups are a delicious and visually appealing choice that is sure to leave everyone asking for seconds.
Ingredients for Easy Pecan Tassie Nut Cups
Creating the perfect Pecan Tassie Nut Cups begins with a few essential ingredients that come together to form the perfect balance of flavor and texture. Here’s a breakdown of the key ingredients and why each one is crucial to making these delightful mini tarts.
Pecans: Why They’re the Star Ingredient
Pecans are the heart and soul of pecan tassies. Their rich, buttery flavor and satisfying crunch provide the signature taste that makes these mini desserts so irresistible. Packed with healthy fats, protein, and fiber, pecans are also a great source of essential nutrients. When baked into the filling, the pecans soften slightly but retain their signature texture, creating the perfect contrast to the sweet, gooey filling.
Whether you use whole pecans or chopped pieces, they add both flavor and texture to the tarts. Toasting the pecans slightly before adding them to the filling can enhance their flavor even further, giving the nut cups a deeper, more aromatic taste. For an even richer flavor profile, you can experiment with adding different varieties of pecans, but the classic choice remains the best.
Butter and Flour for the Crust: A Simple but Delicious Foundation
The crust of your pecan tassies is just as important as the filling. A well-made crust offers a tender, flaky base that complements the richness of the filling without overpowering it. The simplicity of butter and flour results in a buttery, melt-in-your-mouth texture that’s easy to prepare.
Butter adds both flavor and a soft texture to the crust. It also helps in making the crust crisp and golden once baked. Flour is the structural component that binds the ingredients together and provides the necessary base for the crust. When mixed with the butter and a pinch of salt, the flour creates a perfectly balanced dough that’s easy to work with.
To get the best texture, it’s important to ensure the butter is chilled before mixing it into the flour. This helps the dough retain its flakiness while baking. The combination of butter and flour is a classic crust recipe that is both simple and effective, ensuring a sturdy base to hold the sweet and nutty filling.

Sugar, Brown Sugar, and Maple Syrup: Key Ingredients for the Sweet Filling
The filling is where the magic happens, and the trio of sugar, brown sugar, and maple syrup plays a crucial role in creating the sweet, caramel-like flavor that complements the pecans.
- Sugar adds sweetness and helps create the gooey, sticky texture that binds the pecans together.
- Brown sugar contributes a deeper, richer sweetness, thanks to its molasses content. This enhances the flavor of the pecans and gives the filling a subtle, caramelized taste.
- Maple syrup adds an extra layer of flavor and richness. Its natural sweetness gives the filling a slightly earthy taste that pairs perfectly with the pecans.
Together, these sweeteners work in harmony to create a filling that is sweet, smooth, and perfectly balanced.
Eggs and Vanilla Extract: Binding the Ingredients Together
Eggs serve as the binding agent in the filling. They help hold the sugar, syrup, and pecans together, giving the filling its firm, yet soft, consistency. The eggs also help the filling set while baking, so each nut cup holds its shape and doesn’t become overly runny.
Vanilla extract is the secret ingredient that ties all the flavors together. Its warm, aromatic notes enhance the sweetness of the sugar and syrup while balancing the richness of the butter and pecans. Vanilla adds depth to the overall flavor profile and ensures that every bite of the pecan tassie tastes comforting and irresistible.
3 Simple Steps to Making Perfect Pecan Tassie Nut Cups
Making Pecan Tassie Nut Cups is easier than you might think! In just three simple steps, you’ll have these mini tarts ready to bake. Each step ensures your crust is flaky, the filling is sweet and gooey, and the final product is golden-brown perfection. Let’s dive in!
Step 1: Preparing the Crust
The crust is the base of your pecan tassie nut cups, and it’s essential for a flaky, delicious foundation. Here’s how to make it:
- Mixing the Dough: Start by combining flour, butter, and a pinch of salt in a mixing bowl. Use a pastry cutter or your fingers to work the butter into the flour until the mixture resembles coarse crumbs. You want to see small, pea-sized pieces of butter throughout the dough—this will create a flaky texture when baked. Next, add a small amount of cold water (about 1-2 tablespoons) to bring the dough together. Be careful not to overwork the dough to maintain that flaky texture.
- Pressing the Dough into a Mini Muffin Tin: Once the dough is ready, roll it out on a lightly floured surface and cut it into small circles that fit into your mini muffin tin. You can use a cookie cutter or a drinking glass to make perfect circles. Press each piece of dough gently into the muffin tin cups, ensuring the crust covers the bottom and sides. Don’t worry if it’s not perfect—this is a rustic, homemade dessert! If you find the dough hard to work with, let it chill in the fridge for 10-15 minutes to make it easier to handle.
- Tips for Getting a Perfectly Crispy Crust: To ensure a crispy crust, make sure the butter is cold when mixing it with the flour. Chilled dough also helps to maintain its flakiness while baking. Another tip is to bake the crusts for a few minutes before adding the filling. This “blind baking” helps the crust firm up and prevents it from becoming soggy once the filling is added.
Step 2: Making the Filling
Now, let’s prepare the delicious, gooey filling that will make these pecan nut cups irresistible!
- Mixing the Pecan Filling: In a medium bowl, whisk together brown sugar, sugar, eggs, and maple syrup. The brown sugar will add a rich, caramel flavor, while the maple syrup brings a touch of earthy sweetness that complements the pecans. Stir the mixture until it’s smooth and fully combined.
- Adding the Pecans: Once the sweet mixture is ready, fold in your chopped pecans (or whole ones if you prefer). The pecans should be evenly distributed throughout the filling. The nuts will provide both crunch and richness to each bite.
- Achieving the Perfect Consistency: The consistency of the filling is key to getting that perfect bite. The mixture should be thick, but not too stiff. You want it to hold together when you scoop it into the crusts but not be overly dense. If you find it’s too runny, you can add a bit more brown sugar or let it rest for a few minutes to thicken up.
Step 3: Assembling and Baking Pecan Tassie Nut Cups
Now it’s time to put it all together and get these mini tarts into the oven!
- How to Fill the Crust with the Pecan Mixture: Using a spoon or a small cookie scoop, carefully fill each crust with the pecan mixture. Be sure not to overfill them, as the filling may spill over while baking. Aim for a level fill, just slightly mounded in the center. This will allow the pecans to stay evenly distributed throughout the baking process.
- Baking Tips for Achieving a Golden-Brown Color and a Delicious Texture: Preheat your oven to 350°F (175°C). Bake your pecan tassie nut cups for about 18-22 minutes, or until the crust is golden brown and the filling has set. You’ll know they’re ready when the edges of the crust are lightly browned, and the filling is firm to the touch but still slightly soft in the center. If the tops begin to brown too quickly, you can cover them loosely with aluminum foil to prevent burning.
- Cooling and Serving: Once baked, remove the tray from the oven and let the pecan nut cups cool in the tin for about 10 minutes. After that, gently remove each tart and let them cool completely on a wire rack. They’ll continue to firm up as they cool, and the flavors will settle in for the perfect bite.
Tips and Tricks for Perfect Pecan Tassie Nut Cups
Making perfect Pecan Tassie Nut Cups is easy, but with these extra tips and tricks, you can take your mini tarts to the next level. From ensuring a crispy crust to customizing the filling, these simple suggestions will help you bake like a pro!
How to Prevent Soggy Crusts: Ensuring a Crisp Base
A soggy crust can ruin your entire pecan tassie experience, but with a few tips, you can easily avoid this:
- Chill the Dough: After mixing the dough, chill it in the refrigerator for at least 30 minutes before pressing it into the muffin tin. Cold dough is less likely to become soggy because it holds its shape better while baking.
- Blind Baking: Before adding the filling, bake the crusts for 5-7 minutes until they start to firm up. This is known as “blind baking” and helps set the crust, preventing it from becoming soggy when the wet filling is added.
- Use a Light Hand with the Filling: Avoid overfilling the tart cups. Too much filling can spill over, causing the crust to become too wet. A level fill ensures that the crust stays crisp and doesn’t get overwhelmed by the syrupy filling.
Customize the Filling: Adding Chocolate Chips or Other Nuts for Variation
While the classic pecan filling is delicious on its own, don’t be afraid to get creative! Here are a few ways to customize the filling and add unique flavors:
- Chocolate Chips: For a richer, more indulgent twist, add a small handful of chocolate chips to the filling. Semi-sweet, milk, or dark chocolate all pair beautifully with the pecans, offering a satisfying contrast to the sweetness of the syrup and sugar.
- Other Nuts: If you want to add even more variety, try substituting or mixing in other types of nuts, such as walnuts, hazelnuts, or almonds. Chopped nuts will give the filling additional texture and flavor, creating a more complex and unique taste.
- Coconut Flakes: For a tropical touch, try adding unsweetened coconut flakes to the filling. This gives the nut cups a slightly chewy texture and a delicious coconut flavor that complements the pecans beautifully.
- Spices: Consider adding a pinch of cinnamon or nutmeg to the filling for a subtle, warm spice that elevates the overall flavor.
Make Ahead Tips: Can You Prepare Them in Advance?
Yes! Pecan Tassie Nut Cups are a great make-ahead dessert, which makes them perfect for busy holiday seasons or when preparing for a party. Here’s how to prepare them in advance:
- Prepare the Dough: You can make the dough up to two days ahead of time. Simply wrap it tightly in plastic wrap and store it in the refrigerator. When you’re ready to make the tarts, roll out the dough and continue with the recipe as usual.
- Make the Filling Ahead: You can also prepare the pecan filling a day or two in advance. Store it in an airtight container in the fridge until you’re ready to assemble the tarts. This saves time on the day of baking.
- Assemble and Bake Later: If you want to take it a step further, you can assemble the entire tart, crust and filling included, and store them unbaked in the fridge. Cover the muffin tin with plastic wrap and bake them within 24 hours for the freshest results.
Storage and Freezing: How to Store and Keep Your Mini Pecan Tarts Fresh
Pecan Tassie Nut Cups are just as delicious the next day (or even weeks later) with the right storage. Here’s how to keep them fresh:
- Storing at Room Temperature: If you plan to eat them within a few days, store your pecan nut cups in an airtight container at room temperature. They’ll stay fresh for about 3-4 days.
- Refrigerating: To extend their freshness, you can store pecan tassies in the refrigerator. Place them in an airtight container, and they’ll stay good for up to a week. Refrigeration will also help preserve the texture of the crust, keeping it firm.
- Freezing: Pecan Tassie Nut Cups freeze well, making them a great make-ahead treat for busy times. After baking and cooling, place the mini tarts on a baking sheet and freeze them for 1-2 hours until firm. Once frozen, transfer them to a freezer-safe bag or container. They’ll keep in the freezer for up to 3 months. To serve, simply thaw them at room temperature for about an hour or reheat them in the oven at 300°F for 5-10 minutes to bring back that freshly baked flavor.
Why You’ll Love These Easy Pecan Tassie Nut Cups
If you’re looking for a simple yet indulgent dessert, Pecan Tassie Nut Cups are sure to win you over. With their irresistible combination of flavors, ease of preparation, and versatility, these little treats are perfect for any occasion. Here’s why you’ll absolutely love them:
The Perfect Balance of Sweet and Nutty Flavor Pecan Tassie Nut Cups
Pecan Tassie Nut Cups offer the ideal balance between the rich, buttery sweetness of the filling and the earthy, satisfying crunch of the pecans. The sweetness from the brown sugar, maple syrup, and vanilla extract is complemented by the nutty flavor of the pecans, creating a flavor profile that’s both comforting and indulgent. The combination of textures—the crispy crust, gooey filling, and crunchy pecans—makes each bite a delightful experience. Whether you enjoy a subtle hint of sweetness or a bold, nutty flavor, these mini tarts hit all the right notes.

Easy to Make Pecan Tassie Nut Cups and Great for Busy Bakers
These mini desserts are incredibly easy to make, even for those who aren’t seasoned bakers. With just a few simple ingredients and three straightforward steps, you’ll have a batch of Pecan Tassie Nut Cups ready to go in no time. There’s no need for fancy equipment or complicated techniques—just a muffin tin, some basic mixing, and you’re on your way. Whether you’re a beginner baker or someone looking to whip up a quick dessert, this recipe is perfect for all skill levels.
Plus, since the dough and filling can be prepped ahead of time, you can make them when it’s most convenient and bake them right before serving, which makes them a great option for busy schedules.
Fun, Bite-Sized Treats That Everyone Will Enjoy Pecan Tassie Nut Cups
There’s something undeniably fun about bite-sized desserts, and Pecan Tassie Nut Cups are no exception. Their small, compact size makes them easy to grab and go, perfect for parties, potlucks, or a family gathering. Kids and adults alike will love the convenience of these mini tarts, which are just the right size for satisfying your sweet tooth without overindulging.
Additionally, their individual portions make them a great choice for sharing. You can serve them as a fun, grab-and-go treat at a dessert bar or serve them as part of a larger spread. No matter the occasion, everyone will enjoy these cute, flavorful, and perfectly portioned nut cups!
Conclusion
In conclusion, these Easy Pecan Tassie Nut Cups offer the perfect combination of simplicity, deliciousness, and versatility. With a buttery, flaky crust, a gooey, nutty filling, and the satisfying crunch of pecans, each bite of Pecan Tassie Nut Cups is a delightful experience that’s sure to impress. Whether you’re new to baking or an experienced cook, this recipe for Pecan Tassie Nut Cups is simple enough for anyone to master—and the results are absolutely worth it!
These mini tarts, or Pecan Tassie Nut Cups, are ideal for any occasion, from holiday dinners like Thanksgiving and Christmas to casual get-togethers and parties. Their bite-sized nature makes them easy to serve and share, and their rich, sweet flavor is guaranteed to be a hit with guests of all ages. Plus, with the ability to customize the filling and make Pecan Tassie Nut Cups ahead of time, you can enjoy them without the stress.
So, what are you waiting for? Give these Easy Pecan Tassie Nut Cups a try at your next event or holiday celebration—you won’t regret it! And when you do, we’d love to hear about your experience. Don’t forget to share your results, variations, or thoughts in the comments section below. Happy baking, and enjoy every bite of these delightful Pecan Tassie Nut Cups!

